Chocolate Volcano Cakes

I love to watch the Great British Baking Show. They have a side series, Masterclass, where the two judges (Paul and Mary) give you their take on recipes the contestants had to make. From this spin-off I learn so much from watching these highly experienced people bake. In one episode Paul Hollywood made these Chocolate Volcanoes and I knew I had to try them for myself. They’re so easy and so amazing that I made them twice in one weekend because everyone called for more.

I’m only going to link to his recipe because I copied it exactly. Below is a little review about the process with some tips I learned along the way. Go ahead and try them out. You’ll be in love.

To melt the chocolate and butter create a double boiler on your stovetop. I used a saucepan of simmering water and placed a glass bowl on top making sure the bottom of the bowl didn’t touch the water.


Mixing the egg yolks and sugar properly is a crucial step! It will take around 5-7 minutes to achieve the thick mousse-like texture. It might not seem like it will ever reach this state, but it will!  Just keep beating. The color will be a pale yellow and you’ll see lines from the beaters fade back into the batter within a second. The batter will be pretty thick from all the air you’ve incorporated into the batter.


When folding in melted chocolate and flour be gentle so you don’t know all the air out of the eggs you just whipped up!

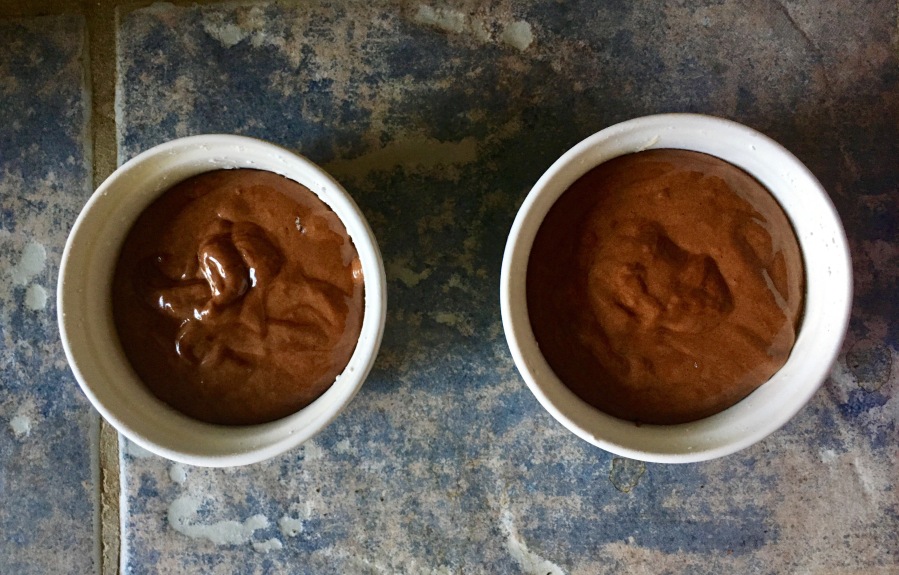
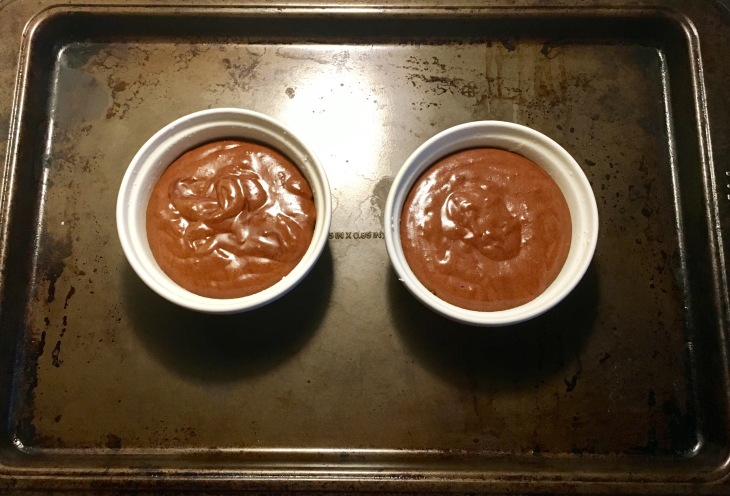
I don’t have proper pudding molds so, I used ramekins and it seems to work just fine. Pudding molds would make the end result taller and more volcano like. Using ramekins I ended up with chocolate mounds… still delicious! I was out of cocoa powder (gasp! I know!) but I lined the ramekins with butter and powdered sugar and it worked great. I think it would be prettier with cocoa powder, but next time!

img_2041

img_2054

img_2057

img_2063-1

These will be very hot! So be sure to use a kitchen towel or mitt when flipping them onto a plate.  Mine stuck to the sides, maybe because I used a ramekin or because of the powdered sugar. I slid a knife along the edges of the volcano and ramekin and it slid right out!

I ate these plain, no cream (didn’t have any on me) and they were wonderful!

My overall thoughts?  They’re very simple to make and only need a few ingredients. You can make them well ahead of time to sit in your fridge until ready to bake and eat. With the molten center you’ll definitely get the WOW! gasp from your guests. The size is just right to satisfy a chocolate dessert craving without being too rich and making you feel too full. I love them and will definitely be making them a lot more!

Blueberry and Lemon Curd Pavlova

Meringue in general can sometimes be finicky. Making meringue in Houston, TX can be challenging because every day is a humid day, which means the meringues could end result could be too soft/sticky or not last that long. I still make them regardless. Why? Because they’re so delicious.  Sometimes I just want a light and airy dessert. These pavlovas are perfect for the summer and pretty guilt free. 

The hardest part in making them is whipping the egg whites but I promise it’s not that hard to do. When whipping egg whites make sure your bowl and beaters are very clean. Also make sure no egg yolk accidentally gets into the egg whites.

Before an after baking. Notice how nicely meringue keeps it shape. It’s ok if the outside cracks. The outer layer will be crisp and the inside will be like melt in your mouth marshmallow. The topping is a simple whipped cream folded with lemon curd and toped with blueberries. I love the tartness and sweetness of these flavors.

img_2004img_2009img_2014

Thanks for stopping by!  I’m on vacation, but will be back next week with another recipe and write-up about South Padre Island!


Blueberry and Lemon Curd Pavlova


Credit: the kitchn

Ingredients

    For the meringue:
  • 1 cup granulated sugar
  • 1 1/2 tsp. cornstarch
  • 1 tsp. vanilla extract
  • 1 tsp. white vinegar
  • 4 egg whites
  • For the topping:

  • 1 cup cold heavy whipping cream
  • 1 tbsp. lemon curd
  • 2 cups blueberries

Directions


– Preheat the oven to 250F. Line a baking sheet with parchment paper
– In a small bowl combine sugar and cornstarch. In a separate small bowl coming vanilla and vinegar
– Place egg whites in a very clean and dry large metal or glass bowl. Use a hand mixer or stand mixer with whisk attachment to whisk egg whites on medium speed. Make sure beaters are very clean and dry.
– Beat egg whites until soft peaks form . Add sugar and continue beating at maximum speed until stiff peaks forms.
– Add the vanilla and sugar and beat until just combined.
– Using a spatula spread the meringue on the baking sheet in two circles or four smaller circles
– Bake the meringue for ~60-70 minutes. This sometimes takes longer on very humid days. The meringues are cooked when the outsides are dry to the touch. The exterior will have a slight crunch and the interior will be like marshmallow.
– Turn off the oven and allow the meringue to cool. On very humid days I allow the meringue to cool in the oven for ~30 minutes and then finish cooling on a rack.
– While meringue is cooling add whipping cream to a bowl and beat on high speed until stiff peaks form. Fold or beat in the lemon curd until just combined
– Place cooled meringues on a plate. Spread lemon curd whipped cream over the top and place blueberries on top.
– Pavlovas should be consumed within an hour or two of assembly.

Notes:
– Whipping egg whites can be finicky. Ensuring your bowl and beaters are very clean and no egg yolk has mixed with your egg white is very important to achieving stiff peaks. Essentially no oils or fat present.
– Soft peaks: when you remove the beaters the meringue left on the beater will form a peak that folds back on itself.
– Stiff peaks: when you remove the beaters the meringue on the beater will form a peak that keeps it shape and does not fold down.
– I have read you can make meringues a day or two ahead of time and keep in airtight container. It’s really humid where I live so this tends to not work for me as meringues will go soft by the next day.

Sheet Pan Chicken, Potatoes, and Veggies

I’m back, readers! Last week became unexpectedly busy at work. Things were just so hectic I unfortunately didn’t have time to write a post despite having some photos for recipes ready. This week is again busy at work and we’re also preparing to leave for a week long vacation on Friday morning!

We’ll be spending time on South Padre Island, TX. South Padre is a little over five hours from Houston and it’s well worth the drive. The beach is beautiful white sand and the water is clear and blue. I promise to come back with  photos. I also prepped some posts for you while I’m gone. Continue reading “Sheet Pan Chicken, Potatoes, and Veggies”

Pickled Jalapenos, Carrots, and Onions

Packing

This year we planted a jalapeño plant and it is loving life right now. With all these jalapeños coming in I decided to try my hand at pickling jalapeños in small jars. I love pickled jalapeños on burgers, hotdogs, and tacos. If you’re in Texas you know that they’re a must have side with BBQ.

You can make an easy refrigerator type that will last a few weeks or you can go through the process of canning so they last about a year. This was my first attempt at canning and it was easier than I thought!

I’ve done a few variations of this with white vinegar, apple cider vinegar, rice vinegar, and different combinations of spices. The recipe below is the one I’m in love with so far. The next set of jalapeños that come I’ll make into candied jalapeños, which I think are even more delicious on burgers and hot dogs than pickled ones.


Pickled Jalapeños, Carrots, and Red Onions


Inspired by: David Lebovitz

Ingredients

  • 3 8oz canning jars with lids
  • 1/2 pound jalapeño peppers, sliced into rounds 1/4 inch thick
  • 1 medium carrot, sliced 1/4 inch thick
  • 1/2 red onion, sliced 1/4 inch thick
  • 1 cup unseasoned rice vinegar
  • 1 cup water
  • 3 garlic cloves, peeled and crushed
  • 2 Tbsp. kosher salt
  • 1 Tbsp. sugar
  • 1/2 tsp. oregano
  • 1 Tbsp. black peppercorns
  • 3 small bay leaves

Directions

  • Bring a large stock pot of water to boil, for canning.
  • In a saucepan heat the vinegar, water, garlic, salt, sugar, oregano, peppercorns, and bay leaves until salt and sugar are dissolved and mixture is simmering.
  • Add the sliced jalapeños, carrots, and onions. Continue simmering for 1 minute. Cover, remove from heat, and let stand ~15 minutes.
  • While waiting wash canning jars in hot water and let dry.
  • Ladle the jalapeño mixture into the jars evenly. Fill with liquid until just covered and leaving a small airspace. Use a chopstick or small spatula to pack jalapeño mixture down and release any air bubbles. Wipe the rims of the jars. Place lids on top and tighten until finger tight.
  • Using a canning basket or utensil (I use tongs), place jars in stock pot of boiling water and make sure cans are fully submerged with ~1-2 inches of water on top. Cover and let boil for ~20 minutes.
  • Remove jars from boiling water and let sit until completely cool. Canned pickles should last in the pantry about one year. As jars cool you should hear a pop as the lids seal. The lid should be vacuumed in and should not pop up and down when pressed.

    Recipe Tips:
  • Visit these sites to learn more about the canning procedure: National Center for Home Food Preservation and the Complete Guide to Home Canning
  • Make sure your canning jars are very clean using hot water
  • If your can doesn’t seal, try placing it back in the water bath for ~10 minutes. You may or may not hear an audible pop as it seals
  • Wear gloves when cutting jalapeños

Wednesday Night Veggie Bowl

Today is Wednesday and for us that means Wednesday Night Veggie Bowl!

Buddha bowls and vegan bowls are pretty popular now. We have our own rendition of a veggie bowl that we eat almost every week. This is definitely something that I look forward to on Wednesday. Why Wednesday? I’m not sure exactly. It’s just something that started and stuck. This veggie bowl is pretty straightforward and easy. Some components can even be made a few days ahead of time. Continue reading “Wednesday Night Veggie Bowl”

Strawberry Rhubarb Tart

I just learned that May is national strawberry month! Also, last weekend was Mother’s day. Unfortunately my mother lives in South Carolina so, it’s been a long time since I’ve been able to spend it with her. I am very fortunate to live close to The Boyfriends mom who I consider a second mom. This year we prepared a lunch for her consisting of spinach and kale salad, roast chicken, tomato cobbler, extra biscuits, and this strawberry rhubarb tart.

Continue reading “Strawberry Rhubarb Tart”

Crispy Rice Treats- Brown Butter and Matcha

This treat is quick and so easy to make!

IMG_1838
Having a geological discussion under a live oak at Dixie Plantation

Last weekend was busy and this work week was also busy. Last weekend I traveled to Charleston, SC to celebrate my undergrad alma mater’s alumni weekend. Charleston is such a beautiful city and the College of Charleston is nestled in the heart of the downtown peninsula. On Friday I spent most of my time in my old geology department touring the new facilities. I was even part of an alumni panel to discuss with students career and grad school opportunities. Later we hung out in a newly revamped part of town, Upper King, and checked out some of the new bars. Saturday was filled with a tour of the college’s Dixie Plantation followed by the college’s big party, A Charleston Affair. I love visiting Charleston and I’m always a little sad when I have to leave.  It was so nice to see old friends and professors and to stroll under the beautiful live oaks places all over the campus. Continue reading “Crispy Rice Treats- Brown Butter and Matcha”

Strawberry Cake


Strawberry season reminds be of being a kid in small town Gilbert, SC. Springtime meant picking buckets of ripe strawberries at the local strawberry farm and devouring as many as I could. We made so many strawberry desserts and extras were prepped for freezing.

Sadly, the strawberry cake I grew up with normally came from a box and was bring pink in color. When I decided to find a recipe to make my own strawberry cake with fresh strawberries so many of them called for using strawberry jello. Nope, I’m not into the ‘jello in my cake to imitate strawberries’ thing. I want real strawberries in mine!

Continue reading “Strawberry Cake”

Tomato Cobbler and Southern Buttermilk Biscuits

Here it is. My very first recipe. It feels good to finally have a recipe on here! I’ve already learned so much and still have a ton I want to work on especially in the photography area. This tomato cobbler combines the sweet flavor of roasted tomatoes with warm flakey southern buttermilk biscuits. Add some Gruyère to the biscuit dough to really take it to another level.

Continue reading “Tomato Cobbler and Southern Buttermilk Biscuits”

So it begins…

With a blog name finally chosen I write my first post. My goal for this blog is to hold myself accountable in creating something new and learning new skills. I will hopefully become a better baker, practice writing, learn new photography skills, and finally get around to playing with web design and some coding. Some of my recipes will be inspired originals and some will simply be an amazing recipe I saw on another blog. I work full-time so weekends, mainly Sundays, are really the only time I have to experiment with new recipes. I enjoy cooking and baking a variety of foods, but desserts are my favorite. Thus, Sweet Sunday Table now exists in this corner of the internet.